Gluten-Free Flour TortillasMakes four 8-inch
tortillas
These whole grain Gluten-Free Flour Tortillas are nutritious, versatile, low
fat, and fun to make. Many of my readers were looking for an alternative to
brown rice tortillas, which tend to crack and split. Well, here you are: These
are made with millet and sweet sorghum instead!

1 Put dough on board; roll into a ball

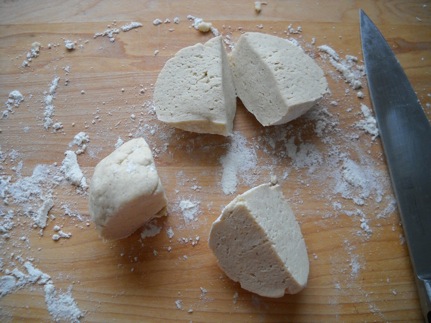
2 Cut into four pieces

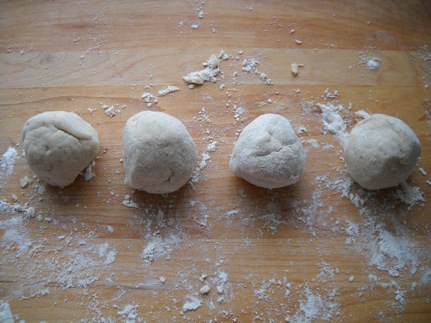
3 Roll into four balls

4 Press into a circle

5 Roll out into a 9-inch circle

6 Trim from around the bowl

7 Lift tortilla with spatula

8 Finished tortillas
Ingredients
- 1 cup Gluten-Free Bread Flour Mix (recipe follows)
- 1 tsp xanthan gum*
- ¾ tsp double-acting baking powder**
- ½ tsp fine sea salt or table salt
- ¼ cup plus 2 Tbsp rice milk
- 2 tsp canola oil
Directions
- Measure out flour mix by spooning flour into a dry measuring cup, then
leveling it off with a straightedge, or the back of a knife. (Do not scoop the
flour directly with the measuring cup or you’ll wind up with too much flour for
the recipe). Combine flour mix with xanthan gum, baking powder, and salt,
whisking well.
- Heat rice milk until warm (not hot). Make a well in the center of your dry
ingredients, pour in rice milk and canola oil, and mix with a wooden spoon until
combined. The dough will be sticky.
- Turn out dough onto a board or work surface, lightly floured with some
Gluten-Free Bread Flour Mix. Sprinkle a little more flour mix onto dough and
onto your hands.
- Knead the dough about 30 seconds, until smooth and no longer sticky, then
mold into a ball. Place ball into bowl, and cover bowl with a damp kitchen
towel. Let rest 20 minutes. Remove dough from bowl, and cut into four pieces.
Roll into four balls.
- Transfer balls to a dry plate, cover with damp towel and let rest another 10
minutes. Working with one ball at a time, sprinkle a little more flour mix on
the work surface. Using the palm of your hand, press ball into a disk about
4-inches in diameter.
- Sprinkle a little more flour mix on dough; flip and roll out into about a
9-inch circle with a floured rolling pin. I usually like the heavy old-fashioned
rolling pins, but for this recipe I prefer the lighter French dowels.
- Using an offset spatula, loosen dough from board all the way around, flip,
and give it one more roll over. Don’t worry that it’s not a perfect circle.
We’re about to fix that. Place an 8-inch bowl over the tortilla, and trim the
edges.
- Remove bowl, and use the offset spatula to separate the tortilla from the
board.
- Transfer tortilla to a plate and cover with the damp towel while you roll
out the rest. Repeat steps to roll out the remaining three, remembering to add
more flour mix to your work surface and rolling pin.
- Heat a 10-inch cast-iron skillet over high heat until it starts to smoke.
You want that puppy really hot.
- Add a tortilla, cook 30 seconds, flip with a spatula and cook 30 seconds
more until there are a few brown spots on surface. Do not overcook, or the
tortillas will become brittle. Transfer to a plate, and keep covered with a dry
cloth while you finish cooking the rest. Eat warm or at room temperature. To
store any that don’t get eaten right away, wait until cool, then seal in a zip
lock freezer bag and place in freezer.
*You may use guar gum in place of xanthan gum if you are concerned about corn
derivatives.
**
Hain Featheweight Baking
Powder is corn free, and can be used in place of double-acting baking
powder.
Gluten-Free Bread Flour MixMakes 6 cups
Ingredients
- 1 1/2 cups millet flour
- 1 1/2 cups sorghum flour
- 2 cups tapioca starch
- 1 cup potato starch
Directions
1. Measure out flour by spooning flour into a dry measuring cup, then
leveling it off with a straightedge, or the back of a knife. (Do not scoop the
flour directly with the measuring cup or you’ll wind up with too much flour).
Combine all ingredients in a gallon-size Ziploc bag. Shake until well blended.
Store in refrigerator until ready to use.
“Gluten-Free Bread Flour Mix” recipe reprinted
with permission from The Allergen-Free Baker’s Handbook: How to Bake Without
Gluten, Wheat, Dairy, Eggs, Soy, Peanuts, Tree Nuts, and Sesame. Copyright ©
2009 by Cybele Pascal, Celestial Arts, an imprint of the Crown Publishing Group,
Berkeley, CA.
“Gluten-Free Flour Tortillas”
Copyright © 2010 by Cybele Pascal


